You can now manage redirections in AVD and W365 based on Conditional Access (CA)policies. If the condition in the policy is not met, you can restrict the redirections of the clipboard, local drives, printers, and USB devices.
A common scenario that I have run into where this feature would be beneficial is when an organization wants to allow clipboard mapping from company managed devices but not the user’s personal device.
To configure context-based redirections, you need to have the following:
- Configure a CA policy with an authentication context and have it assigned to a user group.
- For AVD, configure the RDP properties on the AVD host pool to map the authentication context for the redirections you want to manage with the CA.
- For both Windows 365 and AVD, make sure there are no existing policies (Group Policies, Configuration Profiles) that manage redirections to avoid conflicts.
Big Chris recommends: If you don’t want to delete the policies, you can set them to “Not Configured.”
Currently, context-based redirections can be used with following redirections:
- Clipboard
- Local Client Drives
- Printers
- USB devices
Most of the configuration is done in the Azure Portal under Entra ID Conditional Access.
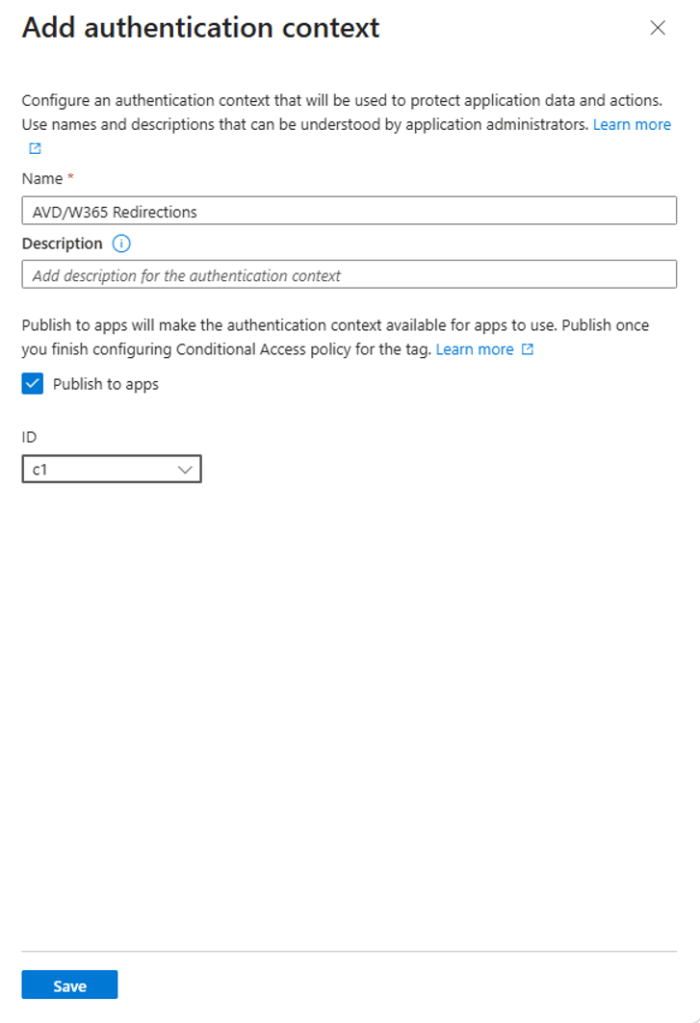
Configure a new authentication context.
- From the Azure Portal, in the search bar, type “Conditional Access”
- In Conditional Access, browse to Manage > Authentication contexts.
- Press New authentication context.
- Enter the name, description of the new authentication context.
- Select the Publish to apps checkmark and then select a variable from the ID dropdown.
- Click “Save.”
Next, you need to configure the conditional access policy.
- While still in Conditional Access, navigate to “Policies.”
- Click “New Policy,” then select the following configurations to create a new Conditional Access policy. This policy will be for managed and compliant devices:
a. Add the name of this new Conditional Access policy.
b. In User or agents, select “All users” under “Include.”
c. In Target resources, click on the dropdown under Select what this policy applies to and select “Authentication context.”
d. Under Select the “authentication contexts this policy will apply to,” click on the authentication context you want to use (the one we just created).
e. In Grant, select “Grant access and then check the Require device to be marked as compliant” and click “Select.”
f. Toggle the Enable policy to On.
g. Click “Create.”
You will need to ensure your environments are configured to use authentication context for redirections. For AVD:
- In the Azure Portal search for “Azure Virtual Desktop” and select the matching entry.
- Select “Host pools,” then select the name of the host pool you want to configure.
- Select “RDP Properties,” then select the “Device redirection” tab.
- Head over to the targeted redirections, select in the dropdown options “Dynamically configure using authentication context.”
- Authentication context selection will appear, click on the dropdown, and select the authentication context you want to use.
- Click “Save.”
For W365:
- From Intune, browse to Devices > Manage Windows 365 Cloud PCs > Cloud PC Settings.
- Click “Create,” then select “Remote Connection Experience.”
- Name your setting, then click “Next.”
- For the redirections that you want to use authentication context select “Authentication Context…” from the drop-down menus.
- Click “Next” here and the other fields. Assign the settings appropriately.
To validate the settings have applied appropriately, log into either your AVD or W365 environment from a corporate, managed device and a personal device. Redirections should be allowed from a corporate, managed device, and NOT from your personal device.
This is a great new feature that allows device redirection for AVD and W365 from devices you trust!

Leave a comment